






The parts of a zipline: every component of a complete system
A zipline looks simple: clip in and let gravity do the work. Behind every safe ride, though, is a system of parts that must be designed together — slope, wind, temperature, rider weight, friction and speed all affect how the line behaves. This guide walks through each component and what to decide about it.

Cable, anchors and platforms
1. The cable
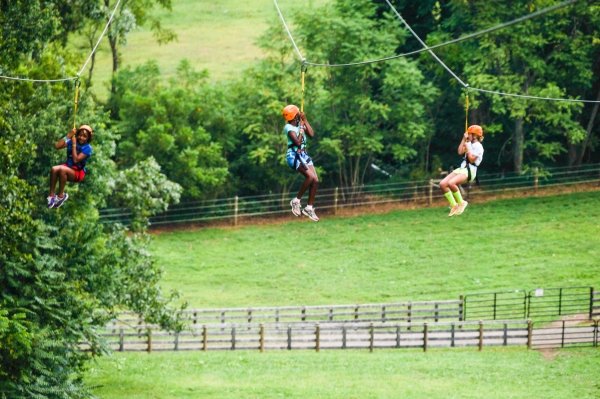
The line defines the ride: the views, how long they last and how fast riders go. Start and end points, length and drop are the first design decisions. Commercial ziplines use galvanised or stainless steel wire rope; the diameter and construction follow from the engineering, not from habit.
Two numbers matter most: sag (how far the cable hangs below a straight line) and tension (the pull on the anchors). They are linked — a tighter cable sags less but loads the anchors more — and both change with rider weight, temperature and wind. They are calculated for loaded and unloaded conditions to confirm ground clearance along the whole span.

2. Anchors, towers and platforms
The cable tension ends up in the anchors — foundations, ground anchors, poles, towers or (where allowed) trees. These take the largest loads in the system and are designed with the applicable safety factors.
Where the terrain provides the drop, simple launch and landing platforms are enough. Where it does not, raised towers create the height. Platform size follows from the braking system and the space staff and riders need: the landing platform must leave room for the main brake and the emergency brake to work.
Trolley, harness and lanyards

3. The trolley
The trolley is the rider's vehicle. Choose it for the speeds your line produces, the cable diameter and — just as important — the braking system at the end, because trolley and brake must work together. Trolleys also differ in rolling resistance and weight, which changes the speed profile of the ride.
A magnetic braking trolley uses eddy-current braking inside the trolley to limit speed along the line. It regulates speed but does not stop the rider, so the line still needs an end brake.
4. Harness and lanyards
Riders wear a sit harness (or a full-body harness for some ride types and small children) connected to the trolley with lanyards and connectors. Sizes must cover your full guest range, and all PPE needs its own inspection and replacement schedule.
Main brake, emergency brake and landing zone
"How do I stop at the end?" is the question every first-time rider asks. The answer should be: you don't have to do anything. Passive braking slows riders automatically, which improves safety, throughput and the guest experience.
5. The main brake
The primary brake absorbs the rider's energy at the end of the line. Common passive systems are spring brakes, magnetic end brakes such as zipSTOP and block-and-tackle systems. The brake is sized for the full range of arrival speeds and rider weights.
6. The emergency arrest device
An emergency arrest device (EAD) is a secondary brake that stops the rider automatically if the main brake does not. Both brakes are tested with unmanned test runs before opening. Read more in does your zipline need an emergency arrest device?
7. The landing zone
The landing zone is the stretch where riders slow down, stop and unclip. Its layout follows from the predicted arrival speeds: enough braking distance, clearance under and beside the rider, a safe staff position and a separate unloading area.
Landing zone design checklist
- Arrival speed range for the lightest and heaviest rider, with head- and tailwind
- Braking distance for the main brake, plus the travel of the emergency arrest device
- Clearance to the ground, structures and vegetation along the braking stretch
- Staff position out of the line of travel, with a clear view of arriving riders
- Separate, level area for unclipping and leaving the platform

Compare end brakes on our zipline brake systems page. Ordering parts for an existing line? See the shop categories for zipline braking systems, zipline trolleys and zipline harnesses.
Staff, riders and inspection
8. Trained staff
Guides run the clip-in checks, the launch procedure and the landing. Good guides also make the ride: they brief, reassure and tell riders about the surroundings. Train them on your specific line and its procedures.
9. The riders
Decide who the line is for — a family attraction, a canopy tour or a high-speed thrill ride. That sets the speed, the rider weight range (for example 40–110 kg / 88–243 lb) and the experience you build around it.
10. Inspection
Installation is only the start. Daily pre-use checks, periodic maintenance and an annual main inspection keep every component working as designed. Our lifecycle management service sets up that regime.
What are the main parts of a zipline?
The cable, its anchors, the launch and landing platforms or towers, the trolley, the harness and lanyards, the main brake, the emergency arrest device and the landing zone — plus trained staff and an inspection regime to operate it safely.
Is a zip wire the same as a zip line?
Yes. "Zip wire" is the common British term and "zip line" or "zipline" the common international one; the components are the same.
Who should design a commercial zipline?
A qualified zipline engineer. The cable, anchors, trolley, brakes and landing zone have to be calculated as one system and designed to the applicable standard — in Europe EN 15567 (European Ropes Course Standard). A zipline feasibility study is the usual first step.
Planning a zipline?
Send us the start and end points of your line. A feasibility study tells you whether it works, how fast riders go and what the cable, anchors and brakes need — before you commit to construction.